電動ポイント・マシン (2) |
Electric Actuators (2) |
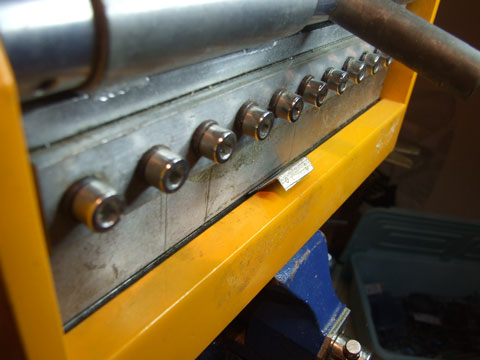 |
I got cheep toggle switches (DTDP) with waterproof caps from e-Bay. I made switch brackets from t0.8 brass sheet. The pieces were bent by a sheet metal bender. 防水キャップ付きのトグルスイッチが安く手に入った。スイッチブラケットを作ることにした。大量にあるt0.8の真鍮板を切り出し、友人に借りた折り曲げ機で曲げる。 |
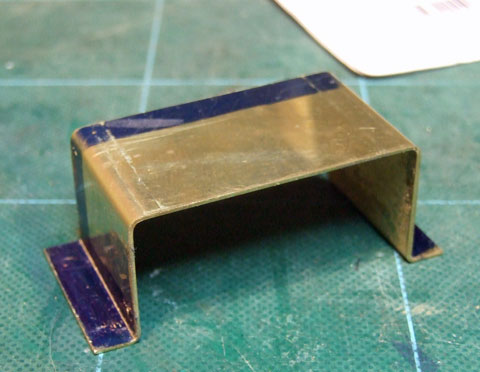 |
Bent bracket. こんなのができる。 |
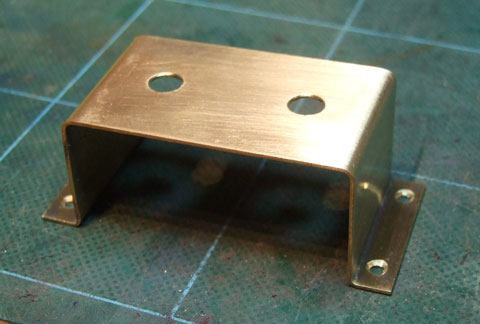 |
Necessary holes were drilled. I drilled Φ6 holes for switches with a step drill. 穴あけ完了。スイッチ用のΦ6の穴はステップドリルを使用。食い込むこともなく綺麗に開いた。 |
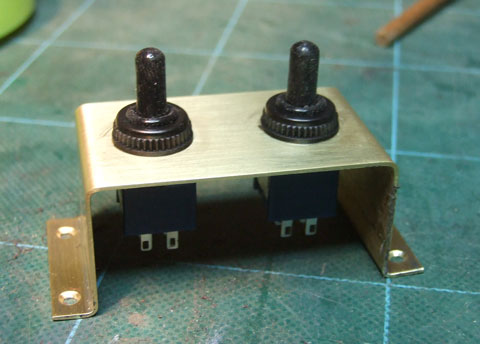 |
Switches were mounted. These are cheap Chinese staff (only A$7.57 for 5 with postage) and I wonder how long last. 防水キャップ付きDTDPトグルスイッチを取り付ける。中国製の安物なのでどのくらいもつかわからん。5個でたったのA$7.57送料込みだった。 |
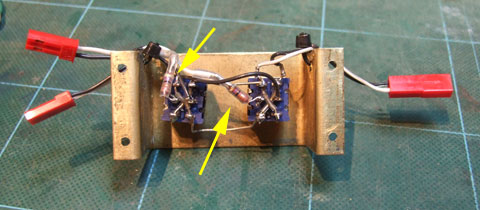 |
Wiring was made. Arrowed ones are 100Ω-1W resistors to limit the current. The connection method is the same as reverse switch of track powered railway model. I installed connectors to make installation and maintenance easy. 配線をする。矢印が電流制限用の100Ω-1W抵抗器。つなぎ方はレール給電鉄道模型の逆転スイッチと同じ。メンテを考えてコネクタ接続とした。 |
 |
I used thin electric wire on hand to connect the switches and servos. I made twisted pairs by twisting two wires together by an electric drill. One end was fixed on a vice and other end was turned by the electric drill with tension applied. スイッチ、ポイントマシン間の接続は手持ちの電線を二本ツイストペアにした。一端をバイスに挟み、他端を電気ドリルで張力を与えながら回せば簡単にツイストペアができる。 |
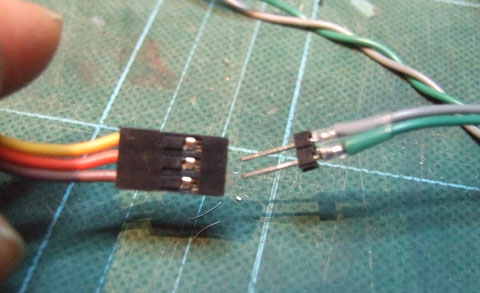 |
I used pin-headers servo side connection to make polarity change easier. サーボ側のコネクタはピンヘッダとした。これだと簡単にサーボの回転方向を変えられる。 |
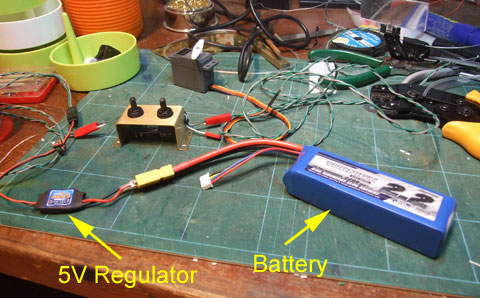 |
Temporary setup for test. 11.1V Lipo battery as connected to the switches via 5V voltage regulator. Obviously it worked fine. とりあえずシステムを仮組み。11.1V Lipo電池と5V電圧変換器をつなぐ。当然ちゃんと動いた。 |
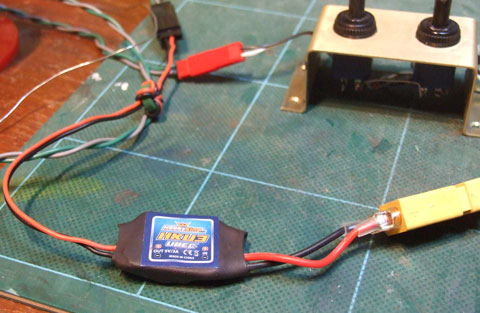 |
Voltage regulator is a BEC for R/C (US$3.57) having 3A capacity and short circuit protection. I made a mistake while testing and shorted the output, but no problems found. 電圧変換器はR/CのBEC用。これもUS$3.57と非常に安かった。3A出力で短絡保護付き。テスト中にショートさせてしまったんだが全く問題なかった。 |